Showing posts with label food. Show all posts

Tuesday, January 18, 2011

recipe: pistachio ice cream


I think every Indian kid remembers their trips to the Indian grocer once a week. I'd peer at the spices and the bags of lentils before making our way to the registers, where I would reach into the cooler and grab a kulfi. Kulfi is Indian ice-cream, but not made the traditional way. It's creamy and fragrant (thanks to saffron and cardamom) and comes in exotic flavors - my favorite was always pistachio.

I finally found a recipe that rivals that kulfi I enjoyed as a kid. It still needs some personal tweaks, but is pretty close to perfect. Under the guise of being called 'Pistachio Ice Cream,' this isn't like that green stuff you can get at Haagen Daz. It's got a wonderful nutty flavor and tastes really, really indulgent. So much so that just one scoop is enough to satisfy the nightly sweet cravings of Husband and I. Ice cream purists might not believe that this is an egg-free ice cream...its creaminess comes from reducing heavy cream and milk (much like a traditional kulfi is made).


Ingredients

*2 cups whole milk
*1 T. plus 1 t. cornstarch
*1 1/2 ounces cream cheese, softened (3 tablespoons)
*1 1/4 cups heavy cream
*2/3 cup sugar
*1 1/2 tablespoons light corn syrup
*1/2 cup toasted pistachios, very finely ground (toasted in oven at 350 degrees F for 15 min)
*1/4 teaspoon pure almond extract
*1/4 teaspoon kosher salt

Directions

1) In a small bowl, mix 2 T. of the milk with the cornstarch. In another large bowl, measure out the cream cheese and let soften.
2) In a large saucepan, combine the remaining milk with the heavy cream, sugar and corn syrup. Bring the milk mixture to a boil and cook over moderate heat for about 4-5 minutes. Off the heat, gradually whisk in the milk-cornstarch mixture. Return to a boil and cook over moderately high heat until the mixture is slightly thickened, about 1 minute.
3) Gradually whisk the hot milk mixture into the cream cheese until smooth. Whisk in the pistachios, almond extract and salt. Set the bowl in the ice water bath and let stand, stirring occasionally, until cold, about 20-30 minutes.
4) Freeze in your ice cream maker (I used my Kitchenaid mixture ice cream maker attachment, and it took about 15-20 minutes). Pack the ice cream into an airtight container. Freeze the pistachio ice cream until firm, about 4 hours.

*The original recipe calls for the ground pistachios to be strained out of the mixture just before freezing in an ice cream maker, but I did not do this. Kulfi is never strained of its nuts.

*In the future, I might try adding a touch of cardamom to this ice cream, at step 3.

Tuesday, November 30, 2010

In-laws and Almonds


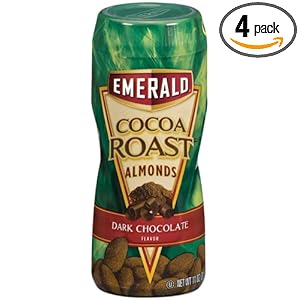
Just back from a wonderful week with the in-laws in Miami. Weather was fab (mid 80s). We ate our way through anything and everything, which is why I've been researching diet cleanses for the past hour. I kid, sort of. But these Cocoa Roast Almonds from Emerald are no joke. MIL and SIL recently discovered them and started buying them by the caseful (apparently they occasionally go on sale at the local Publix for BOGO). Anyway, they are amazing...roasted almonds covered with a light dusting of dark cocoa powder. I think these would make the perfect midday snack, and a great alternative to the handful of candy you might normally grab (oh wait, is that just me?) They also come in Cinnamon, but I prefer the Chocolate. Buy them now!

Monday, July 19, 2010

lazy weekend

I finally had Husband all to myself for the entire weekend, with no interruptions from the work email via Blackberry. It was a much-needed break for him, and I thought a relaxing picnic with an easy summery lunch was in order. We trekked out to the Brooklyn Bridge Park, wanting to avoid the crowds (and the scene) at Central Park. What we found was just idyllic...a few couples laying out, young families playing frisbee, and a shaded spot under a newly planted tree with our names on it.

A few pics we snapped from Husband's new BB Tour. Insanely jealous about the quality of the pics as compared to my Curve, but I have the Droid Incredible coming my way, which I hope is as amazing as I hear.

First thing's first


Picnic essentials


The view


Watching the clouds go by

Thursday, July 15, 2010

simmer down

It's official...we're moving in the fall! To where, we haven't decided (staying within NYC). Moving is a huge pain for everyone involved, but it's also a great excuse to clean house, so to speak. I've been purging our closets in a big way since the beginning of the year, and am moving on to the kitchen cupboards. How much stuff is in your cupboards and freezer that is random and never gets used? For us, it's too much. I've embraced the slow cooker to use up about a pound of lentils, and am busy making old-school fruit-suspended-in-jello to get rid of the canned pineapple. Randomness!

We've also acquired tea, and don't drink it regularly enough to have a need for 10 different varieties. On one of our 100+ degree days, I had the idea of making a super strong batch of tea and sweeten it with nothing but lemonade Crystal Light. It's really tasty and refreshing and practically makes itself.

I just fill a medium saucepan with water, boil, and then drop about 10 tea bags in (pull off the strings beforehand). Steep for maybe 15 minutes, remove the bags, mix in the Crystal Light, and let the tea cool. Pour it into a pitcher, and fill the rest of the way with water. Cool and enjoy.

I don't measure a thing, but I do know my pitcher is 2.5 quarts, and I use one small plastic Crystal Light container. The tea is strong, but the lemonade takes the bite out. I guess it's technically an Arnold Palmer, but tastes way better than others that I've had. Maybe because the tea is actually brewed fresh?

Monday, June 28, 2010

love this stuff


The brew and the polish. The drink is Reed's Original Ginger Brew. The polish is Essie's Turquoise & Caicos. Obsessed with both.

Tuesday, May 18, 2010

street fare


I love many things about NYC in the summer - street fairs being one of them. Any given weekend during spring/summer, several city blocks shut down to vendors selling everything from handmade jewelry, hand-dyed scarves, screenprinted tees, and all kinds of food. Now, I remember when the food at street fairs was dirt cheap...you could get hand-squeezed lemonade, chicken kabobs, fries, and ritas for under $15. Times have changed, but the food is just as good (and just as fattening, so we only indulge once in a while now).

I can't ever resist the funnel cake vendor, and this past Sunday, we tried the fried Oreos too. OMG. Sinful. We classed it up by eating them on an actual dinner plate, instead of a half-ripped paper plate. Pretty sure we'll be hunting for these every single weekend.

Friday, May 14, 2010

recipe: Creamy 2-minute salad dressing

I love me a good full-fat ranch or buttermilk dressing! Heck, when I was younger, I used to eat salads with straight-up mayo. Those days are gone with my childhood metabolism and chicken legs, but I still find myself craving a simple, creamy salad dressing from time to time...even as I choke down a basic balsamic vinaigrette.

Enter this super simple, creamy dressing recipe. It is so basic, but so good. I usually make the recipe below, but happen to think it's fab with a little curry powder sprinkled in. I also think it would make a great base for tuna salad!

Original recipe from thekitchn.com


Ingredients:
* 1 t. dijon mustard
* 1 1/2 T. mayo [I substitute full-fat Greek yogurt since we rarely keep mayo around, and it turns out wonderfully tangy. Whatever you do, don't use a non-fat mayo or yogurt. You need some fat to properly emulsify the dressing.]
* pinch of salt
* pinch of sugar
* dash of fresh ground pepper [I'm pretty generous with my grinds.]
* 1 T. champagne vinegar

Directions:
Whisk together all ingredients except for the vinegar until combined. Slowly whisk in the vinegar. [This supposedly makes enough for 2 small salads, but if you're like me and drown your salads in dressing, then double the recipe for 2 people. Also, I have no idea how this keeps, but it's honestly so simple to just throw together in a pinch.]

Friday, April 9, 2010

water, water everywhere


Every spring, I resolve to try drinking more water. I succeed for a few weeks, during which time my skin becomes glowy, my face clearer, and my bloat disappears. Then, I forget, or get lazy. There are various water calculators out there on the interwebs, which take into account everything from activity level to your number of alcoholic drinks per day. I usually just take half my body weight and assume that's what I should aim for.

Enter this awesome pitcher. It kicks up water in a refreshing way, and is super easy to set up. Cut up fruit (I'm sticking with citrus for now), drop into center cylinder, fill pitcher with water, attach lid, wait about an hour, and bamn! Perfectly flavored water. I keep it right on my counter for the day so I can easily keep my glass full.

I bought mine from the Crate & Barrel online outlet, but I've seen it on several other websites. Crate & Barrel Infusion Pitcher ($19.95)

Saturday, February 13, 2010

cadbury gooey goodness

Husband and I LOVE Cadbury Creme Eggs (CCEs). Possibly because they have such limited availability (February through April), much like Girl Scout cookies, Candy Corn, and Peeps. Possibly because they are so satisfying to eat, giving a chocolate fix and pure sugar rush from the fondant. We seriously need to exercise control when we visit the drugstore. Anyway, since I'm torturing myself getting in shape for my upcoming Mexico trip, I'm trying to limit the number of eggs I consume this season. I did some research and found some surprising info:

*CCEs are available year-round in the UK.

*CCEs sold in the US are smaller than those sold abroad.

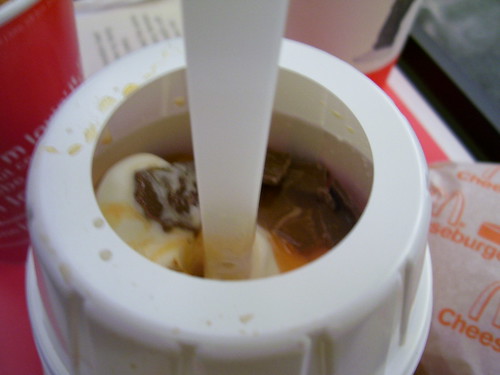
*McDonald's in the UK have a Cadbury Creme Egg McFlurry (genius!)


*They have been deep-fried (sweet Jesus...we need one of these!)


* They have a strange Facebook page (is it a game or a tribute?)

*There is an EHow describing how to eat one (it's complicated business, I know). Some choice lines (is there a hidden message here?):

~ Remove all of the foil at once, or just a little bit at a time if you want to nibble at the egg so the chocolate doesn't get all over your fingers. ~ Bite off the top quarter of the egg. Stick your tongue inside the chocolate shell of the egg to lick out all of the creme filling. ~ Pop the whole egg in your mouth, if you are too impatient to nibble, and relish the squish as the chocolate bursts open to let the fondant spurt out. ~ Challenge yourself to nibble most of the shell off first, leaving the creme filling balanced on a tiny piece of chocolate. Practice until you can leave only the tiniest bit of chocolate possible. ~ Enjoy the brief energy rush that comes from eating 161 calories of sugar.

Regardless of the form you consume them, I hope you get to eat plenty of these before they're gone until next year (or at least eat a few for me)!

Wednesday, January 13, 2010

recipe review: chocolate guiness cupcakes

Nigella Lawson's Chocolate Guinness Cake (made into cupcakes)

Review: Super easy to make. Cupcakes weren't super moist but icing was divine. Perfect for those not crazy about chocolate - has a subtle chocolate flavor that's not too sweet.

I mentioned that we were going to try cocktails of champagne and Guinness (nothing to write home about - I prefer each separately). What to do with the extra Guinness but make Nigella's Chocolate Guinness cake (and sip some while baking, of course)! I had to wear my new apron from Husband for the occasion (from Anthro - loves it).


Ingredients (for the cake):
* 1 cup Guinness stout
* 1 stick + 2 T. unsalted butter
* 3/4 cup unsweetened cocoa
* 2 cups superfine sugar (I subbed granulated Splenda)
* 3/4 cup sour cream
* 2 large eggs
* 1 T. vanilla extract
* 2 cups all-purpose flour
* 2 1/2 t. baking soda

Ingredients (for the icing):
* 1 box cream cheese, 8 oz. (softened to nearly room temperature)
* 1 1/4 confectioner's sugar
* 1/2 cup heavy cream (I used 1/4 cup skim milk, which was fine)

Directions:
1) Preheat oven to 350 degrees. Butter a 9-inch springform pan and line with parchment paper. [Since I was making cupcakes, I just used cupcake liners and buttered a mini loaf pan for the extra batter.]

2) On medium-low heat, combine the Guinness and butter (add butter by the tablespoon). When butter melts, remove pan from heat.

3) Add cocoa and sugar, whisk to blend (I did not whisk, since I was using my nonstick pan).

4) In a small bowl, combine sour cream, eggs, and vanilla until mixed well. Slowly add to the Guinness mixture.

5) Add flour and baking soda, whisk until smooth. [My biggest mistake was forgetting to take the batter off the heat! My batter ended up kind of dry and rubbery, and in a panic, I added more Guinness to compensate. Bad move...do not do this!]

6) Pour mixture into buttered pan or muffin sheet (I only did 2 tablespoons batter in each cup, which is why my cupcakes look so sad and puny...I should have done at least 3-4). Bake until risen and firm - about 45 minutes for the springform pan, and about 20 minutes for the cupcakes. [If in doubt, stick a toothpick in the middle...it should come out clean or with a crumb or two.] Let cake cool completely before icing.

7) Mix confectioner's sugar and cream cheese (I'd highly recommend using a hand mixer...I tried using a whisk to disastrous results). Add cream (or milk), and mix until smooth.

8) Let the icing commence! Ice the top of the cake (or each cupcake) as high as you can to look like the froth at the top of a just-poured pint. [I borrowed a neighbor's cake decorating bag, which worked well for this.]


As you can tell, this recipe didn't go as smoothly as my others, but it turned out good nonetheless. I might substitute a bit of canola oil in place of some butter to add some moisture to the cake. Also, since the flavor almost resembles bittersweet or dark chocolate, I might try using whole-wheat pastry flour instead of all-purpose (don't think it would detract much from the intended taste).

Tuesday, January 5, 2010

long-term lusts

Husband and I used our time together this weekend to go over the household finances - assessing our spending and saving over the past year and adjusting our budget for this year. One thing that floored me was spending in the Clothing category. Oops. Pretty sure most of that was me. Even though we live in NYC (= shopping mecca), I rarely buy clothing in stores...instead using coupon codes, major sales, and ebates to make online purchases. That discount shopping really adds up. I try my best to keep up carefully edited wishlists, but it's easy to stray.

I've vowed to do better this year. Less random shopping from F21. Less sale shopping from J Crew and Anthro. More thoughtful purchases.

To that end, I thought it would be fun to show my long-term wishlist. Full of items that (most people) couldn't just buy on a whim. Items I plan to keep for as long as humanly possible. Items I have no business buying as a student...but that could be good gifts for 'monumental' occasions (PhD completion, big birthday, etc.). Sometimes it's fun to dream!

Burberry Trench Coat


The price is prohibitive, but I swear I would wear out the cost and then some! So classic, so chic...a quality piece that gets better with age. A coat I'd never get bored of, and that can complement about a million different looks.

Nikon Digital SLR Camera


I've had a longtime dream of being a really good photographer. Or at least pretending. I'll play around here and there with my little Canon point-and-shoot, but I hope to someday get my hands on a Nikon DSLR.

Cartier Two-Tone Tank Francaise Watch

I have 2 watches I have worn regularly for the past several years. A Swiss Army stainless steel watch, and a two-tone vintage Gucci found for a steal. The Cartier Tank is sleek, classic, and goes with everything. It's a grown-up piece. Love.

Jimmy Choo Knee-High Boots

Picture Source

Every woman has a quest for the perfect black boot. I have several pairs that are ok, but not THE pair I would re-sole and re-purpose until the end. The leather on these Choos are buttery soft and the quality is impeccable. At 85 mm tall (just over 3 inches), they seem comfortable but still chic and dressy (for work or a night out).

Le Creuset Dutch Oven

Haha! You thought I would list some other high-end fashion-y item. Nope. A Le Crueset dutch oven seems to be a must for serious cooks. I could get so creative with this thing! Sadly, not only are they expensive, but we have no room for one in our teeny kitchen. Someday, I will prepare meals in this for a/our family!

Thursday, December 31, 2009

intrigued...


Last year we welcomed 2009 in Times Square - a very cool, once-in-a-lifetime experience (ie: we had a friend staying at a Times Square hotel, who secured wristbands=no waiting in the freezing cold and being able to get up close to the ball):


This year, we're having a low-key evening. I'm making Ina Garten's Greek Salad, RealSimple's Mushroom, Brie & Arugula Pasta, and Nigella's Chocolate Guinness Cake (in cupcake form). While looking up fun champagne cocktails (mango bellinis mmm), I came across a Black Velvet. Champagne + Guinness in a 4:1 ratio. We'll already have the Guinness, so I'm definitely interested in trying this. Will report back.

Have everyone has a safe and happy new year! Goodbye decade, hello 2010!

Wednesday, December 30, 2009

recipe review: oatmeal raisin cookies


Smitten Kitchen's Thick, Chewy Oatmeal Raisin Cookies
Review: So easy to make, so easy to store. Perfect for a last-minute event.

So I wrote about our new household love for steel cut oatmeal...this love left us with two bulk-sized bags of quick oats to use up. I figured oatmeal cookies would be perfect! I like my oatmeal cookies chewy and dense, but not too sweet. These fit the bill, and store wonderfully! Best of all, they are incredibly easy - two bowls and no electrics save for the oven.

Ingredients:
* 1 stick butter, softened to room temperature
* 1 1/3 cup light brown sugar, packed (I reduced this to just under 1 cup.)
* 2 eggs
* 1 t. vanilla extract
* 1 1/2 cups all-purpose flour (I substituted whole-wheat flour.)
* 1 t. baking soda
* 1 t. ground cinnamon
* 1/2 t. salt (SK recs using a bit more salt in baked goods, which I agree with.)
* 3 cups rolled oats
* 1 1/2 cups raisins
* 1 cup nuts, chopped (optional)

Directions:
1) Preheat oven to 350 degrees F.
2) In one bowl, mix the butter, brown sugar, eggs, and vanilla until smooth. (No need for a hand mixer...I just used a regular whisk.)
3) In a second bowl, whisk together the flour, baking soda, cinnamon, and salt. (You could also just sift these together in a colander, which would also get rid of lumps.)
4) Stir dry ingredients into wet ingredients. Once combined, stir in oats, raisins, and/or nuts.
5) (SK recs chilling the dough prior to baking, for thicker cookies). Drop by the tablespoonful onto a baking sheet lined with parchment paper (I use a Silpat for cookies). Bake for 10-12 minutes, until cookies are darker at the edges. They should appear a bit undercooked. Let sit for 5 minutes, then transfer to cooking rack.


I made these for a football Saturday on which we had guests, so unfortunately I have no actual cookie pics (a testament to how yummy they are). This recipe makes a TON of cookies...so much dough that I filled two freezer bags with rolled tablespoons. To cook, just take out the frozen dough balls, gently flatten them a bit, and bake. This is great for us...we can easily make a small batch for guests, or just a few for dessert.

Friday, December 18, 2009

recipe review: pumpkin cheesecake


Martha Stewart's Pumpkin Cheesecake
Review: Easy and delicious! Not too rich, not too light. Could have used a touch more pumpkin, but otherwise fantastic!

In my opinion, you can never have too much pumpkin during the cooler months. Fall and winter make me crave warm, spicy, rich foods, and pumpkin almost always satisfies those cravings for me. My contribution to Thanksgiving dinner this year was pumpkin cheesecake, which we substituted for pie. This recipe is incredibly easy...no water baths or even the stand mixer. All you need are a few bowls, measuring cups/spoons, and a hand mixer.

A word of advice. Go for the full-fat cream cheese, not skim or fat-free. Trust me on this. I substituted baking splenda for sugar, which I think was a mistake. Next time I'll just stick with sugar (maybe turbinado instead of refined). It's cheesecake...it's meant to be indulgent!

Crust Ingredients:
* 1 1/4 cups graham-cracker crumbs from 10 whole crackers [We bashed them in a ziploc bag.]
* 1/4 cup sugar
* 4 T. unsalted butter, melted

Filling Ingredients:
* 4 packages (boxes) cream cheese, softened [Leave packages out for a few hours.]
* 1 1/4 cups sugar
* 3 T. all-purpose flour [I used whole-wheat pastry flour.]
* 1 cup canned pumpkin puree
* 2 T. pumpkin pie spice
* 1 T. vanilla extract
* 1/2 t. salt
* 4 large eggs, room temperature

Directions:
1) Preheat oven to 350 degrees, with rack in center.
2) For the crust: Mix graham cracker crumbs, sugar, and butter. Press firmly into the bottom of a 9-inch nonstick springform pan. Bake until golden around edges for 10-12 minutes.
3) For the filling: Using a hand mixer, beat the cream cheese and sugar together on low speed until smooth. Mix in flour (do not overmix). Add pumpkin puree, pumpkin pie spice, vanilla, and salt. Mix until just smooth. Slowly add eggs one at a time.
4) Place springform pan on a rimmed baking sheet. Pour filling into pan. [I gently rotated and wiggled the pan to get the air bubbles out and help the filling settle.] Reduce oven heat to 300 degrees, and place pan in oven. Bake 45 minutes. Turn off oven after this time and let cheesecake sit in oven for 2 additional hours (do not open oven during this time!)
5) Remove pan from oven, cool completely. Cover with plastic wrap and refrigerate until firm (at least 4 hours). Unmold just before serving. [I ran a sharp knife around the edge of the cake before undoing the sides of the springform pan.]

Wednesday, December 2, 2009

recipe review: steel cut oats


Ok this isn't so much a recipe review as it is a rave. I was never much of an oatmeal fan, but forced myself to come around for the nutritional value and ease of preparation. In grad school, I used to use those flavored instant oatmeal packets...after getting married we eliminated the extra sugar and purchased plain instant oatmeal in bulk. Inspired by various food blogs, I started adding mix-ins - dried fruit, nuts, granola, nut butters, maple syrup, protein powders, etc. Nothing else keeps me satiated for as long a time as a decent-sized bowl of oatmeal.

I actually saw a rerun of Good Eats about oatmeal, in which Alton Brown likened instant oatmeal to something he wouldn't even feed a horse! I was mortified...were there really better options? Enter steel cut oats.

I bought a small container from Trader Joe's. Although the directions are daunting (it takes about 30-45 minutes total cooking time), they were actually super easy to make. I estimated that for a workweek's worth of breakfast for the two of us, I'd need to cook about 3 cups of steel cut oats. The ratio of water:oats is 4:1. Just bring the appropriate amount of water to a boil, slowly add the corresponding amount of steel cut oats, continuously stir for 5 minutes until the mixture thickens, and then simmer for an additional 30 minutes (I came back every 5 minutes or so to stir...this helped anything sticking to the bottom of the pot and ensured even cooking). I also added a generous pinch of kosher salt (to the boiling water), and a large pat of butter.

To make breakfast prep even easier, we bought disposable/reusable Ziploc containers. They are the perfect size for oatmeal! I ended up with just over 2/3 cups of cooked oatmeal distributed in 10 containers.

I used to argue that there was nothing easier than instant oatmeal, but I was wrong...reheating pre-cooked steel cut oats are even easier. Just add a splash or two of milk, mix-ins of your choice, and nuke for about a minute and a half (stirring halfway through). And the taste? Wonderfully nutty and textured...they almost pop in your mouth. SO good.

Steel cut oats have more soluble fiber and less calories when compared to the same amount of instant oats. There are many ways to cook them (slow cooker, stovetop, in the oven)...even overnight for those that don't want to stir on and off for 45 minutes. I might be making oatmeal cookies and apple crisps for months to try and use the remainder of our bulk-sized instant oatmeal, because I'm not sure we can ever go back after trying the steel cut version!

Links!
* NYT Bitten Blog: Piece on steel-cut oats (the comments are especially useful)
* Comparison and reviews of various oatmeal types and brands
* KERF: Amazing inspiration for oatmeal mix-ins

Wednesday, November 25, 2009

review: yogurt

And she's alive! After a bout with some kind of stomach bug and a longer bout with acid reflux, I'm finally feeling like my old self. I have the wonders of modern medicine (read: Prilosec) to thank, and also some diet and lifestyle changes. All in about a week and a half. Phew. Sadly, one of those diet changes includes yogurt, which is on the list of foods to 'consume with discretion.' This is probably due to the fact that most people are in some way lactose-intolerant; also, limiting fat intake is one way of avoiding heartburn.

Prior to our honeymoon in Greece, my world was limited to Dannon, Yoplait, or Stonyfield (on sale). I had not yet discovered food blogs, nor did I even look at yogurts over $0.75. For shame! I'll never forget my first taste of Greek-style yogurt...at breakfast on a veranda in Mykonos, overlooking the sea. I attributed our daily breakfast yogurt, topped with honey and muesli, to keeping the weight from creeping on during our travels throughout the Greek Isles (that is, until we got to western Europe...more on that another time, yikes!)

I've tried most of the commercially-available Greek yogurts, and my favorite is 2% Fage, hands-down. It's not as rich and fatty as the full-fat Fage, but not as tangy as the 0% Fage. It's perfectly creamy and satisfying and flavorful. Although expensive ($1.89 at our local Whole Foods, $1.79 at the nearby Trader Joe's), it's a splurge I don't mind making.

My second favorite would be Chobani (I have only ever seen 0% fat versions). It's cheaper than Fage (at least $0.70 cheaper), and tastes wonderful. Better yet, Chobani makes amazing flavored yogurt...with fruit-in-the-bottom choices like Pomegranate, Pineapple, or Strawberry (these have some added sugar). The texture isn't as rich as Fage, and it has less of a tangy bite, so it's a good option for those just starting out on Greek yogurt.

I recently tried Siggi's -- an Icelandic strained yogurt. There has been quite the buzz about this brand all over the food blogs...so I decided to try it when it was on sale. All I can say is BLEGH! It was way too tangy and sour! The texture is quite creamy and custard-like, but that doesn't make up for the taste. At over $2 for 6 oz., it's the most expensive strained-yogurt option, and not worth it, imo. Perhaps the flavored versions are better than the Vanilla I tried?

I know many people love the Trader Joe's Greek-style yogurt, which is the cheapest at under $1. I didn't care for it. Not enough texture for my liking, and the taste was meh. I also can't really comment on the Oikos brand (made by Stonyfield)...I once found a hair in my Oikos yogurt and promptly threw it away after a mere two spoonfuls.

I'd love to try and make my own yogurt from scratch...my mom does it all the time with live cultures from India. Another option is to strain the extra whey from a regular tub of plain yogurt...I have been meaning to try this but cheesecloth always slips my mind at the grocery store.

Despite my recent health shortcomings, I still plan to enjoy my yogurt a few times a week. The benefits from the calcium, protein, and probiotics outweigh the potential discomfort I may have (I say that now, but may reconsider if I actually have a bad episode). Stay tuned...

Yogurt Reviews:

Fage Review 1
Fage Review 2

Fage Review 3

Fage vs. Oikos

Fage vs. Chobani vs. Oikos

Chobani Review 1
Chobani Review 2
Siggi's Review 1
Siggi's Review 2


How-To Guides:

How to Make: Homemade Yogurt
How to Make: Greek-style Strained Yogurt

How to Make: Greek-style Strained Yogurt (from scratch)


PS: Griffin's fave yogurt is Fage too! Spoiled pup...

From Griff being cute

Wednesday, November 4, 2009

Updates!

I rarely do updates on past posts, but am always thinking of edits or info I'd like to add. Let's give it a whirl, shall we?

Diet & Exercise

Update from 6/30/09: So we stopped the Apple Cider Vinegar thing...largely because even after choking down the diluted ACV we saw no changes whatsoever. I also did more research and found some pretty decent evidence that the effects of an ACV diet are negligible to harmful. I still have a little left, and it's actually kind of yummy in apple juice (tastes like a tart apple), but will definitely not purchase a bottle again.

Update from 7/20/09: On the other hand, our Green Monster routine stuck. We love them! Our base is always spinach, frozen bananas, and milk. We also usually add chia seeds. As for supplements, we've swapped out the protein powder (reviews to come) for Amazing Grass' Amazing Meal. We've tried various frozen fruit additions (Whole Foods has a good selection of frozen fruit), and decided that strawberries are def the way to go.

To ensure Husband gets enough protein to keep him satisfied until lunch, I've started making protein pancakes! They are so easy to make. For one pancake I start by mixing egg white from one large egg and 1/4 cup oatmeal. The next 1/4 cup can be any number of things...I've used pumpkin puree, mashed banana, applesauce, and a mix of carob chips and nuts. Finish it off with 1 scoop of your chosen protein powder. Mix well, drop onto a frying pan (on medium-high heat) with about 2 T hot olive oil, and cook for maybe 3 minutes on each side.

Update from 7/30/09: Good news and bad news on the workout front. I gave up kettlebells. I truly did love the twice-weekly workouts. But, my amazing instructor left and they canceled one of the classes. I was also developing some knee and back pain...the combination of high impact moves with occasional running was doing a number on me. I thought this was a great opportunity to branch out and try some new classes. And...I'm now obsessed with spinning! Something I NEVER thought I could get into (after one sad attempt at 30 minutes on a stationary bike followed by a week's worth of sore quads). I'm even looking at special cycling shoes! Stay tuned...

Beauty

Update from 8/26/09: As much as I loved the Aveeno Hair Minimizing lotion, it just doesn't stand up to the central heating in my apartment building. I'd forgotten how incredibly dry, flaky and itchy my skin gets when the outside temp drops. Going back to my tried and true Vaseline Intensive Care Cocoa Butter lotion until next spring/summer.

Update from 10/9/09: Again, another beauty product bites the dust come winter. The Boscia eye treatment is wonderful, but it just doesn't provide enough moisture for my skin right now. I wake up to flaky and super dry skin, and that red, raw look has slowly returned. The hunt for an eye cream continues...hearing good things about Origins so that may be my next try.

Fashion

Update from 10/10/09: So many updates here! Well first, I decided against getting a cape. I checked the Anthro one out, and it was actually a greenish taupe color (not the oatmeal I saw on the website). Also, I decided it just wasn't practical for me. I get cold, I need sleeves. Incomplete arm coverage will only do it for me when it's maybe 55-60 degrees. Any warmer, I grab a hoodie or light sweater...any cooler, I need a real coat. The good news is that I picked up a great leather jacket (love it even more than the Vince one pictured)...it's the perfect transition piece and I've already worked it into so many outfits.

I did manage to locate the Anthro Bull's Eye dress, which sold out in my size online...and no thanks AT ALL to the sales associates at the 16th and 5th Ave location (filled out my info for a charge send and they forgot all about it...never heard from them again, UGH). Will def post a review once it arrives!

Finally, I'm totally SOL with regard to the JCrew chambray shirt (sold out online and seemingly in every store), so I can only hope it'll show up at a factory outlet someday. Ditto with the green Anthro purse. It went on sale, was still too much for me, and it disappeared online and in-store. *shrugs* I guess they weren't meant to be.

Finally, the Anthro Cross Your T strappy shoes! They sold out quickly on the website. But thanks to Kim over at Anthroholic, I found out that they are not exclusive to Anthro! I'm watching out for a coupon code or sale on the Seychelles Vaudeville heels!

Dog/Pet

Update from 6/30/09: Our fur baby is almost 9 months old now! And quite the traveled citygoer. He's been on the subway, in various cars, and even on a flight to Miami with us! In each case, he has been a calm little guy - mostly sleeping or being curious. On the subway, we always carry him in a bag and no one seems to care or pay attention. This makes the original linked story pretty curious for me. Maybe her pug was in an open-top bag? And maybe she just got super upset about it and was belligerent with the police? If it were me, I would have exited at the next stop, tended to my pup, and hailed a cab. Well actually, I would have taken a cab to begin with. Anyway, it's the last time I comment on a random story with incomplete facts!

Update from 8/31/09: We finally got Griff some pet insurance - settling on Trupanion. I think we pay around a $40 premium per month with no deductible. Since then, we've had 2 medical issues with him, so thank goodness we finally settled on a package. Will update once we complete the claims.

Tuesday, October 20, 2009

recipe review: nut butters

Once upon a time, there was nothing I loved more then peanut butter...on toast, fruit, in cookies, and on sammies...it was a healthy way to get some extra protein and 'good fat' in my diet. After I swore off regular peanut butter, I set out to find the perfect natural one (Trader Joe's brand is pretty perfect, imo).

All of this changed once I starting following food blogs and discovered nut butters. Why had I never known about these??? The concept was so simple...there are other nuts in the world...why not other nut butters? Almond butter was the most widely used alternative, and my first one to try. Of course I loved it, but wow was it expensive! At nearly $7 for a jar, it cost twice as much as a jar of natural peanut butter. There had to be a better (read: cheaper) way.

We recently bought a food processor to handle some tasks that the regular ole' blender couldn't handle. Perfect time to make my own almond butter! I consulted Heather's recipe for nut butter, and went to work.

First, I spread some raw almonds (about a ziploc bag full) on parchment paper and popped them into the oven at 350 degrees for about 15 minutes, turning them once or twice. You'll know they're done when they get darker and the kitchen smells like roasted nuts.

Once the nuts cooled a bit (about 10 minutes), I threw them into the food processor and went to town.

It took about 10 minutes to achieve the consistency I was after! Halfway through, I tossed in a generous pinch of salt and a squeeze of honey. The result was super smooth, spreadable, and perfectly blended until the bottom of the jar - fantastic!


It tasted better than any store-bought version. We used it in everything from green monsters to oatmeal.

The next experiment was cashew butter. I used Goan cashew nuts, toasted for about 12 minutes at 350 degrees, and later added a pinch of salt and glob of honey into the mix.


It took about 15 minutes to achieve an acceptable consistency. The mixture kept balling up and never really got completely smooth. Most recipes I found included some additional oil, and I'm guessing this would have ensured a better result. It's still great on toast and in smoothies, but not nearly as spreadable as the almond butter.


I love the idea of substituting other nuts butters for the standard peanut butter. Almonds have a ton of Vitamin E and 'good fats.' Research has shown that almonds can reduce cholesterol and boost immunity. Cashews have similar benefits. If you own a food processor (or even a Magic Bullet), give homemade nut butter a try!

*Update: Thanks Amber for the kind words! I forgot to mention in the post: nuts (especially almonds and walnuts I think) are on the pricey side. I get my nuts in huge 5-lb. bags from the Indian grocery store for under $10. If this isn't an option, try and find them wholesale, or buy in bulk...if you can.

Thursday, August 6, 2009

recipe review: lazy loaf

Review: So easy, even a child could do it. Dense and heavy, but super healthy!


So I've been on a health kick for the past few months...more on that to come. Realizing that dietary changes are just as important as fitness changes, I've been reading health/food blogs and health-related articles every day. It's been a tough road so far...trying to educate myself on ingredients and nutritional values, while considering the cost-benefits associated with healthy foods. After all, eating better - filling your cabinets and fridge with wholesome foods - ain't cheap! Sure, chia seeds (the new flax seed for the uninitiated) are high in fiber, protein, and can help keep you satiated for long periods...but they are $6 at my local health food store!

This bread has just a few ingredients you could find just about anywhere...all of which are relatively cheap (esp. if you buy the flour or muesli in bulk). It might just be my easiest recipe to date...a touch more difficult than, say, PB&J. Seriously. If you can measure out ingredients, stir them together, and operate an oven, then you're golden. Six super healthy ingredients (5 if you don't count the water)...it is wonderful warmed up with a touch of butter or jelly. Peanut butter might be too rich a condiment for this, but if you're feeling wild, hey, go for it. To summarize, I'll leave it to Nigella:

"It is heartening to know that you can be in a permanent hurry and spend no more than a few minutes at any time anywhere...and still make a beautiful loaf of bread." WORD.

Ingredients:
*2 3/4 cups wholewheat bread flour [I used pastry flour and it seemed fine.]
*2 cups oaty, unsugared muesli [Purchased from Whole Foods.]
*2 1/2 t. rapid-rise or instant yeast [I used 1 1/2 packages]
*2 t. kosher salt or 1 t. table salt
*1 cup lowfat milk
*1 cup water

Directions:
1) Mix the flour, muesli, yeast, and salt in a bowl, pour in the milk and water, and stir. [Seriously, easy!] It should be the consistency of thick oatmeal.
2) Transfer to a greased or silicon 2 lb. loaf pan [I used a standard Crate and Barrel 1-lb. loaf pan. and it was fine.] Put this into a COLD oven, turning it on immediately to 225 degrees. Bake at this low temp. for 45 minutes.
[I greased my pan with butter. I find that it works much better than Pam, and slightly enhances the taste of baked goods.]
3) After 45 minutes, turn the oven temp. up to 350 degrees and bake for 1 hour. The finished bread will be golden and dense, and should feel and sound slightly hollow if you knock it from underneath.
4) Remove to a rack and cool.

[I'd advise cutting the loaf after just a few minutes of cooling...use a potholder if you feel the loaf is too hot. I made the mistake of trying to cut the completely cooled loaf and it was HARD. Hard to cut and hard as a rock.]
[You should refrigerate the slices until you're ready to consume. I made the mistake of ziploc bagging them and leaving them out on the counter. A week later, our final bag had gone moldy - sick! - and we had to toss 5 precious pieces.]

I managed to cut the loaf into 14 pieces. After a rough calculation, I found that each slice had about 150 calories, 2.3g fat, 7.9mg sodium, 31.1g total carbs (5.5g fiber), and 5.4g protein. Not bad, I suppose. I would eat this for breakfast with some coffee, or pair with a Green Monster if I planned on doing heavy cardio or weights.

Wednesday, July 29, 2009

recipe review: sesame peanut noodles

Review: Nigella does it again! Super simple to make, and easy to swap out or substitute ingredients. Don't worry about making such a large quantity...it gets better with time!


My family went through a Chinese food phase for a few years, during which we dined at Szechuan Garden (and eventually Hunan Gourmet once SG became an Italian place) every Saturday night. We would pretty much always order the same dishes, and I would always pick out every single piece of baby corn as soon as said dishes were set on the table. My baby brother was young enough where I trumped him, and having never had the opportunity to snag a piece of baby corn (I was a quick little thing), he never really knew what he was missing.

This recipe doesn't include baby corn (you can groan at my seemingly useless anecdote now), but it should! Next time I plan on including copious amounts. In fact, you can easily swap out or substitute ingredients as you wish...especially any veggies you like or don't like. The hardest part is cutting the vegetables, and maybe whisking if your wrists just don't move that way. The final product comes close to a decent Pad Thai dish you can order at any number of cheap Thai or Asian delivery joints, but since you control the ingredients, you know you aren't getting anything too sketchy.

Sauce Ingredients:
*1 T sesame oil
*1 T garlic-infused oil [Or just mince some garlic into oil and let it sit for a few minutes. I used olive oil and did not notice any funky taste because of it. You could probably use canola oil as well.]
*1 T soy sauce [I used a low-sodium version.]
*2 T sweet chile sauce
*1/3 cup peanut butter [I used a natural, chunky one from Whole Foods.]
*2 T lime juice [1-2 limes, juiced]

Pasta Ingredients:
*1 1/4 lbs. cooked egg noodles [Cook al dente or just under. I used whole wheat linguine from Whole Foods.]
*2 cups bean sprouts, rinsed [I forgot to rinse mine...don't tell Husband]
*1 1/2 cups snow peas [We forgot to buy these, but they would provide a satisfying crunch.]
*1 red pepper, seeded and diced
*2 scallions, finely sliced [I used 5 scallions and just diced them randomly.]
*1/4 cup sesame seeds [Buy a tub and it will last you forever.]
*1/4 cup freshly chopped cilantro [Omitted because we always seem to waste the extra cilantro after completing a recipe.]

Directions:
1) Whisk together the dressing ingredients in a bowl or small pitcher.
[I did not think the dressing would be enough to cover all of the ingredients, so I doubled the dressing recipe.]
2) Put the noodles, bean sprouts, snow peas, red pepper, and scallions into a bowl. [I added the sesame seeds as well.]
3) Pour over the dressing and mix thoroughly to coat everything well.
4) Sprinkle with sesame seeds and cilantro and pack up as needed.